


Starting Photography on a Budget
Photography can be…expensive. With a hobby/profession with so many upsides, this tends to be the only downside, and OOF. Is it a downside. HOWEVER! Over the years, I’ve found that not enough folks know about ways to pinch more than few pennies by shopping for used gear.
Photography can be…expensive. It’s a hobby/profession with so many upsides, the price tag tends to be the only downside, and OOF. Is it a downside. HOWEVER! Over the years, I’ve found that not enough folks know about ways to pinch more than few pennies by shopping for used gear.
“Really, Sara, your gear is used?”
“YES, imaginary person I’ve invented for this blog conversation, my gear is used! And I’m a professional.”
Full disclosure before we continue - I’m going to be linking our affiliate, KEH Camera for the product recommendations. I also want you to know that KEH is an amazing company with a big heart that has all of my support. They’ve donated thousands of dollars worth of cameras and photography equipment to our non-profit, Illuminate Atlanta, helping to get cameras in kid’s hands in underserved communities across the metro Atlanta area. I can say, first hand, that I’ve seen their generosity change the lives of so many kids, and because of that, I am a big fan, and love to be their cheerleader any chance I get.
So, what’s a better combination than an awesome company that gives back, supporting a local business, and getting yourself some solid gear at a discount? I think that’s called a win-win scenario.
One of the questions I usually get about used gear is “How do you know it’s good?” Well, imaginary person for the blog, finding a reputable dealer is ideal…(see what I did there? Sorry I can’t help it sometimes.) But there’s also a ranking system to know the quality of your gear.
KEH’s quality ranking works as such:
NEW: As packaged by the manufacturer complete with manufacturer's USA warranty. Not previously owned or used by a consumer.
Sara’s translation: AKA - the best of the best quality
LIKE NEW: The rating of the equipment is at 99 to 100 percent of original condition. Items include original box and instructions.
Sara’s translation: Pretty darn near perfectLIKE NEW MINUS: The rating of the equipment is at 97 to 99 percent of original condition. Only the closest inspections will reveal slight wear. Perfect glass, but the box and accessories are usually not included.
Sara’s translation: You’ll barely notice the imperfectionsEXCELLENT PLUS: The rating of the equipment is at 90 to 96 percent of original condition. Exceptionally nice, but may have slight wear on finish visible only under close inspection. Glass will be very clean.
Sara’s translation: Unless you’re a perfectionist, go for itEXCELLENT: The rating of the equipment is at 80 to 89 percent of original condition. Shows moderate wear for the age of the item, with the possibility of dings or blemishes. Glass may have slight blemishes but will not affect picture quality.
Sara’s translation: Really good deal but won’t look the best - remember that at the end of the day, folks will be staring at your photos, not your gearBARGAIN: Priced to sell, the rating of the equipment is at 70 to 79 percent of original condition. More than average wear for the age of the item, and may have dents, dings or finish loss. Glass may have marks or blemishes, but should not affect picture quality.
Sara’s translation: For the brave, but can find a really good deal on really expensive gearUGLY & AS IS: Sara’s translation: Don’t even worry about it - unless you’ve got an in-home camera repair shop, don’t even consider for the beginner.
SO! Here’s my recommendations based on your area of interest:
Beginner 1, The Undeclared Major:
“I have no idea what I want to take pictures of, but I know I want to.”
I whole heatedly recommend the Canon Rebel. This was my starting camera back in the day with the very first digital Rebel camera. It’s a breeze to operate and plenty of lens options to go with it to help you grow. As a bonus, the video quality is great too.
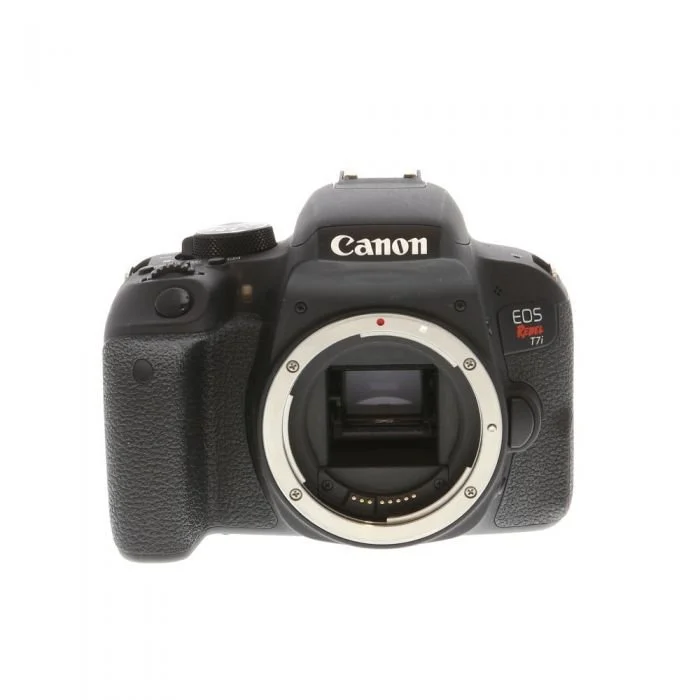
“Umm…hey Sara, where’s the lens?”
Imaginary blog person, you ask such good questions!
Used gear often does not come as a kit, the lens does not come with the camera “body”. Maybe not as convenient as a kit, but you get the advantage of choosing a lens that’s best for you, rather than the one that the camera manufacturers just throw in the box.
Here’s some of my lens recommendations:
Beginner lens for just about anything: Canon EF-S 15-85mm f/3.5-5.6 IS USM Autofocus Lens for APS-C DSLR
Portraits, product, close up photos for a super blurry background: Canon 50mm f/1.4 USM EF-Mount Lens
Birds, wildlife and sports: Canon 70-300mm f/4-5.6 IS II USM EF Mount Lens
Beginner 2, The Traveler:
“I’m going to be doing a bit of traveling (FINALLY) and want to capture some awesome photos along the way”
I’ve been using a Sony camera for the last 3 years now and so say I’m obsessed is an understatement. The mirrorless camera is so lightweight, and it does amazing in low-light scenarios, making it ready for anything. For beginners, the Sony A6500 is the perfect choice.

Even with the lenses, it’s incredibly light weight and compact. It’s low light capabilites are unmatched, so no worries if you’re stuck somewhere with less than ideal lighting conditions. Sony continues to lead the pack when it comes to mirrorless cameras, so this model will be around for the long haul.
For a lens that’s going to be able to do a bit of everything I recommend Sony 18-105mm f/4 PZ G OSS AF E-Mount Lens . It can capture a room and zoom into a decent distance.
If you’re looking for a bit more reach (birds, wildlife, etc) I recommend the Sony FE 24-240mm f/3.5-6.3 OSS Full-Frame Autofocus Lens.
Either one of these cameras is going to be a great start. But of course, while I have a pretty decent amount of camera knowledge (if I do say so myself), KEH has multiple brains all honed into the best gear, so don’t hesitate to contact those awesome folks with any questions.
Once you’ve got your camera, don’t forget to sign up for our Photo 1 class! We’ve got in-person, online and eLearning all coming up January to kick off the year with some awesome photos.
Keep on clickin, y’all!
-Sara
Director, ASoP
6 Mobile Photography Tips Every Photographer Should Know
by Kyla Stewart of Outreach Mama
Having been around for a while, we’re sure you know all about how advanced phone cameras have gotten. Gone are the days when people had to lug bulky professional cameras around for their shoots. Today, even the biggest influencers and vloggers prefer to use their phones instead of heavy equipment.

This is simply because they know they can get amazing results on their phones that rival those of any camera’s. But if you’ve been unable to take the perfect photos from your phone, or you just don’t understand how people manage, maybe it’s time to learn a few new tricks.
Here are some phone photography tricks that will knock your photos out of the park and help you get that perfect shot!
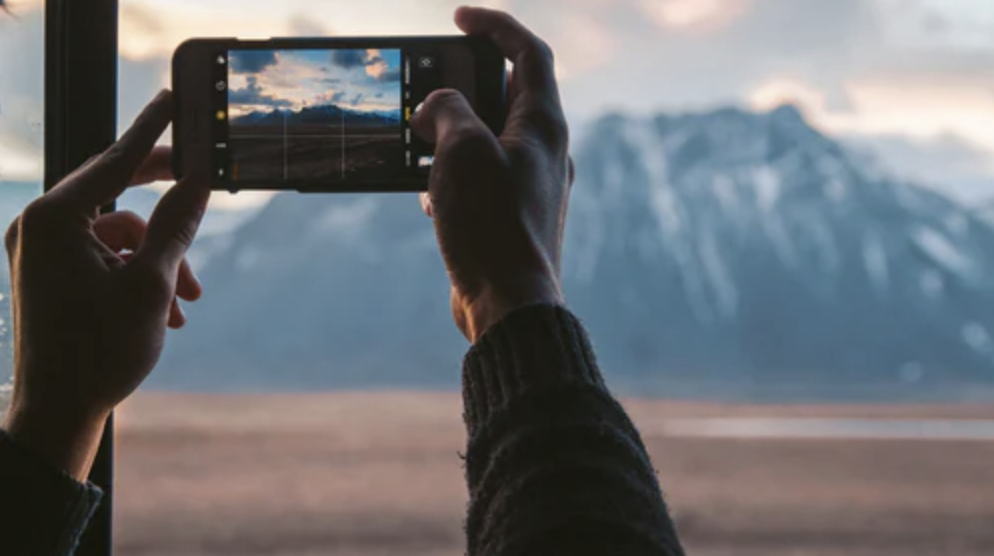
Activate the Grid
There is a feature on almost every mobile phone that creates a 3×3 grid on the photo app’s display. This allows you to properly proportion your photos according to the rule of thirds, and lets you keep it all symmetrical.
It's even useful when you’re taking selfies. In it’s blog about tips for girl selfie photo poses, FaceTune mentions how tilting your head in a selfie is a great way to mix it up a little and we’ve all done it whether you notice it or not. With the help of a grid being visible, you can make sure the selfie is proportional even when you’re trying out wacky stuff like the head tilt or the half-face selfie!
2. Use the HDR Mode
Many times, you want to take a photo where you just can’t get the exposure right. This usually happens when you’re taking landscape photos. Getting the part with shadows or a little definition right leaves the sky looking out of order, but getting the sky right means everything on the ground is dominated by shadows.

This is where HDR comes in. With its help, you can capture landscape photos that look just right, and capture all the details in both the bright and the dark parts of the scene you’re trying to capture.
3. Use Portrait Mode
If you’re taking someone else’s photo (or even your own), the portrait mode can be a great way to put yourself front and center, and have the background take the back seat, so to speak. Just scroll through the different modes in your camera app until you get to this one, and see the magic happen.
In many of the latest smartphones, once the photo is taken you can even go back to it and determine how blurry (if at all) you want the background to be. If you’re not happy with the results, you can just choose to sharpen the background and it’ll look like you took the photo in normal mode.
4. Get the Focus Right
If you’re taking photos of something up close, or of a scene with a lot happening, you can choose what to put front and center. Many cameras automatically focus on faces and otherwise on the center of the screen, but you can change that with a single tap of your finger - literally!

If the phone is too close to the object, the camera won’t be able to focus on it. Usually just moving your camera back a few centimeters does the job and improves the clarity.
5. Clean Your Lenses
This might seem like a small thing, but you wouldn’t believe the number of times people forget this one simple step. Dirty lenses make for some pretty blurry and low-quality photos, which definitely isn’t what you’re going for here.
6. Keep the Phone Steady
When you’re taking photos in the dark, they have more chances of coming out blurry. This is because the camera shutter time for those photos is longer to allow enough light to pass through. On the other hand, photos taken in enough light don’t get blurry that easily, but it can still happen.
When taking photos, try to steady yourself against a wall or a tree, or better yet use a tripod to hold the phone instead.